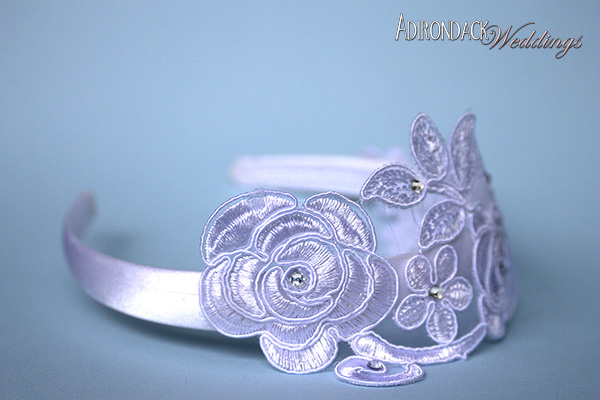
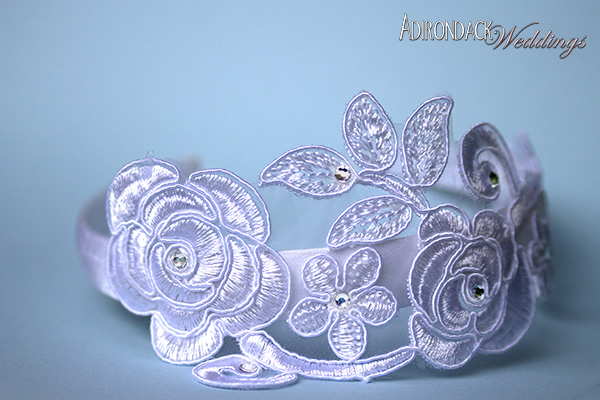
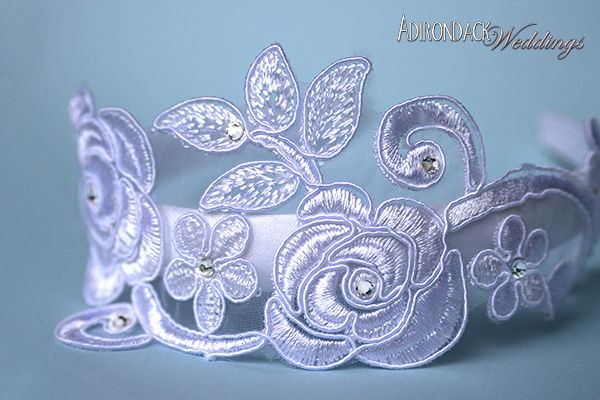
As an Adirondack bride to be, you’ve probably spent many hours dreaming about all the details of your big day. You’ve tried on dozens of dresses, you’ve scouted locations, you’ve pinned hundreds of inspirational images on Pinterest — but have you thought about your accessories yet? In the tradition of our DIY Bridal Earring Set and DIY Fall Leaf Bouquet tutorials, we’ve created an original “do-it-yourself” (DIY) on one of the day’s most important accessories — your headpiece!
Many lovely bridal headbands are available in bridal boutiques or online shops, but they often cost upwards of $100. A more original alternative that also happens to put less strain on your wallet is to make a headpiece yourself! For a fraction of the cost, you can use our method below for a simple and elegant bridal hairpiece for the bride, for bridesmaids, or for flower girls. In creating this quick project, we used a plain white headband, lace pieces, and iron-on Swarovski element crystals, all of which are available from any craft store. (Our cost for the final product was less than $15!)


Materials:
A plain headband or ribbon
Super glue or fabric glue
Iron-on crystals or other decorative elements
A piece of lace
Fabric stiffener (optional, available online or at your local craft store)
Steps:
1. To get a smooth work surface, iron your lace on a medium heat setting with no steam. Take care to protect it by covering with a piece of cloth, like a hand towel or pillowcase.
2. Position your crystal or decorative elements. Take your time as this may require a little playing with. Do you like a lot of bling? Or just a touch of sparkle? Now’s the time to decide.
3. Once you’ve positioned your crystals, carefully cover with cloth and iron according to the direction on the package. It may be best to work with a little bit at a time; that way, you don’t jostle your pieces and end up ironing something to the wrong spot.
4. Allow the lace to cool, then it’s time to attach everything to the head band or ribbon. If you’re using a piece of ribbon, fold the length in half and gently iron the folded end to mark your center. If you’re using a headband, you may want to place it in your hair and use trial and error to find the best positioning for the lace.
5. Once you’ve decided on the positioning, carefully apply a dot of fabric or super glue to your headband and press the lace in place. Start at one end and work toward the other, ensuring that your placement remains intact.
6. Allow to dry completely.
7. Optional Step: You may want to apply a fabric stiffener (or you can make a 1:1 solution of Elmer’s White
or clear glue) to prevent the lace from warping or drooping, especially if you’re using a larger piece. Regular spray starch will not likely be strong enough unless you are using a very delicate, fine piece of lace.

Use this DIY to create your own personal wedding style while being thrifty. You could even incorporate your “something old” by using a vintage piece of lace or ribbon, perhaps a piece passed down from an older generation. No matter what you choose, you’re sure to create a beautiful bridal keepsake!
— Story and photos by Elizabeth Piseczny


